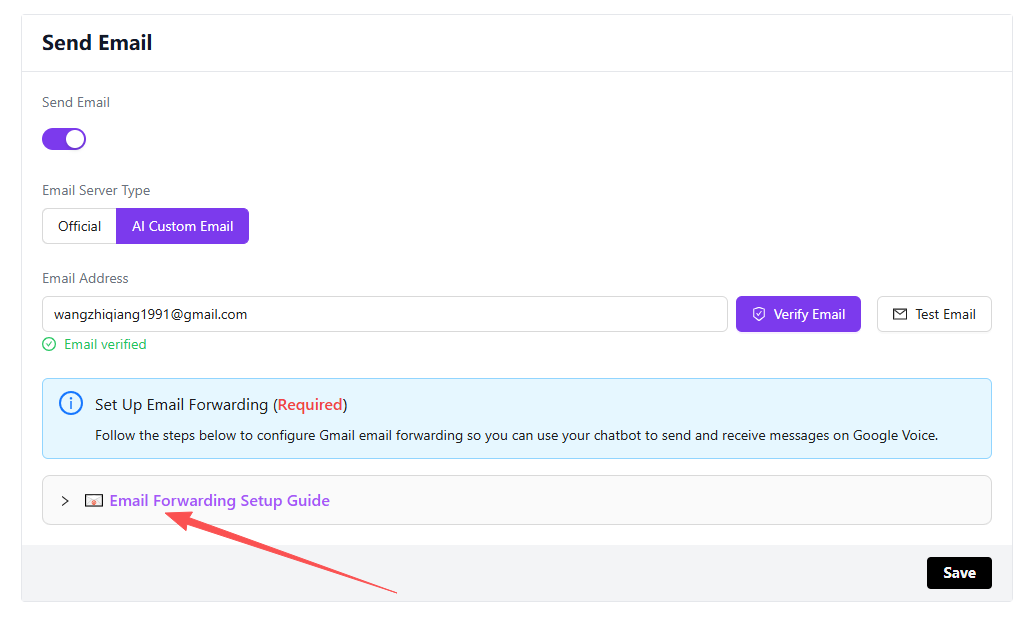
AWS SES Settings
Configure AWS SES email verification and testing
1. Enter Email Address
Enter your email address. It is recommended to use a Gmail address.
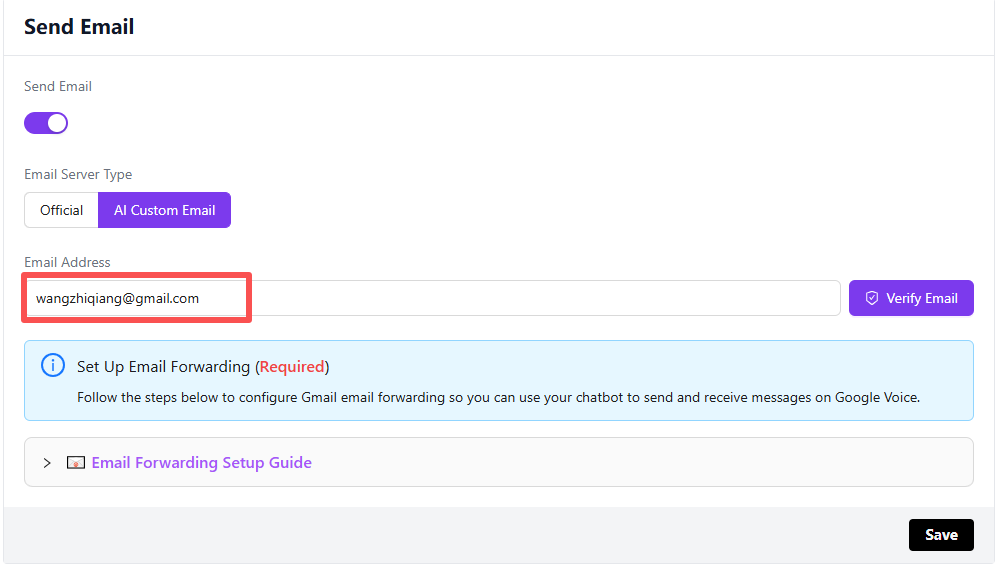
2. Click Verify Email Button
Click the Verify Email button, and you will see a pop-up dialog.
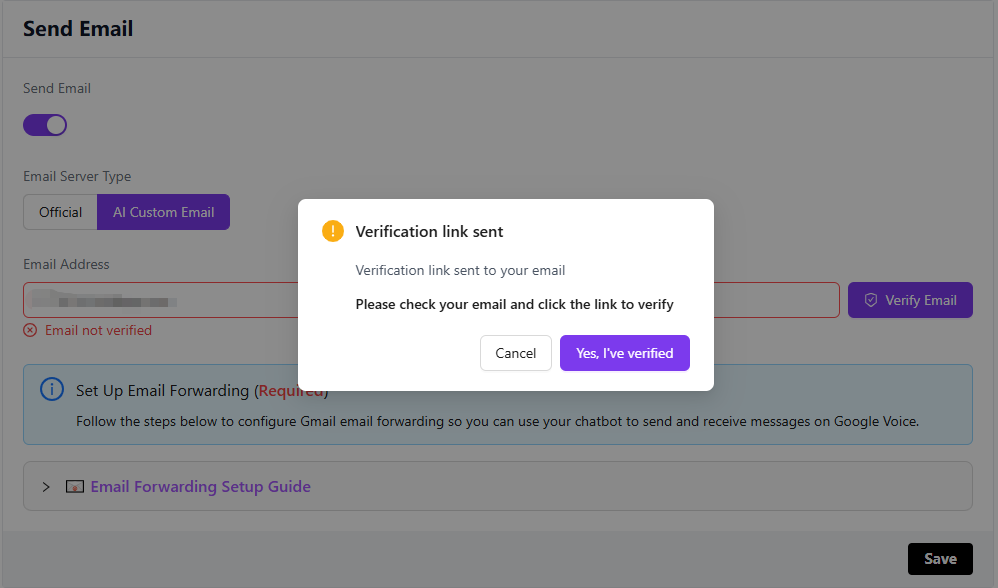
3. Verify Email
Go to your email inbox, find the email from Amazon Web Services, open it and click the verification URL.
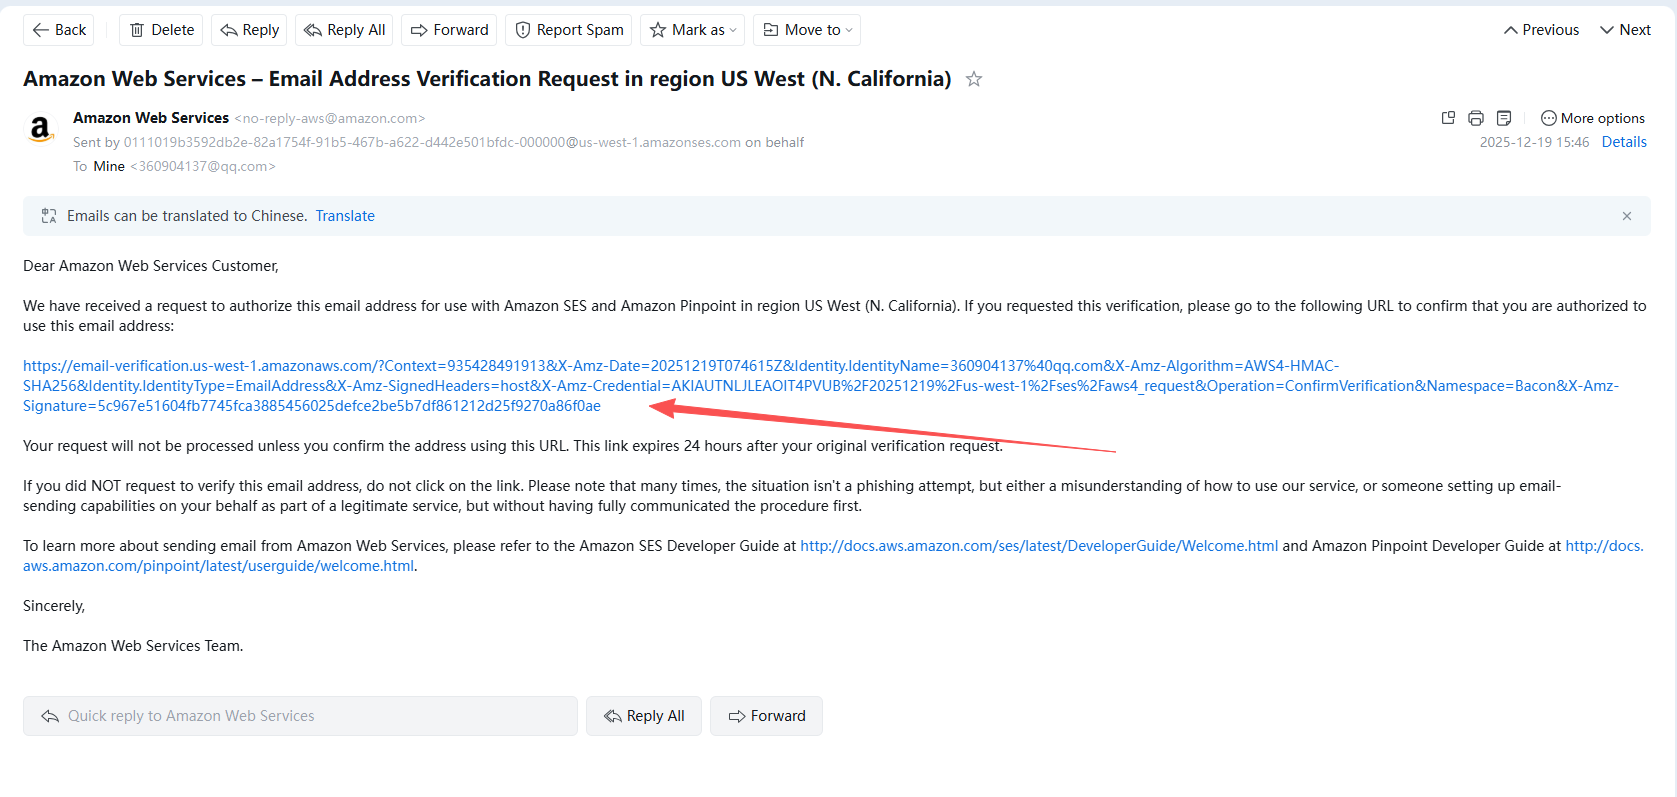
4. Complete Verification
You will be redirected to the AWS SES website. At this point, you have completed the verification.
5. Confirm Verification
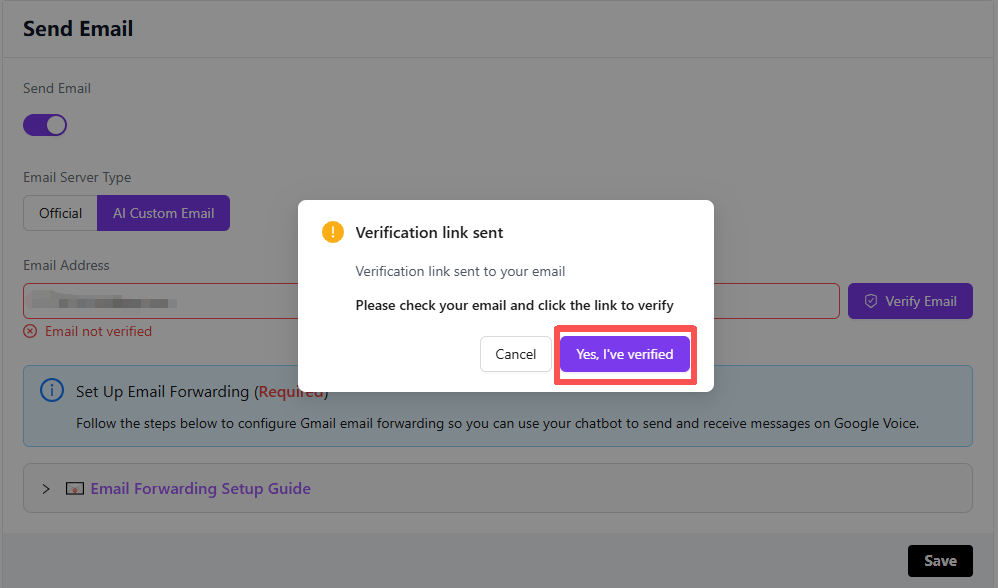
Return to NewOaks and click the Yes, l've verified button.
6. Email Verified
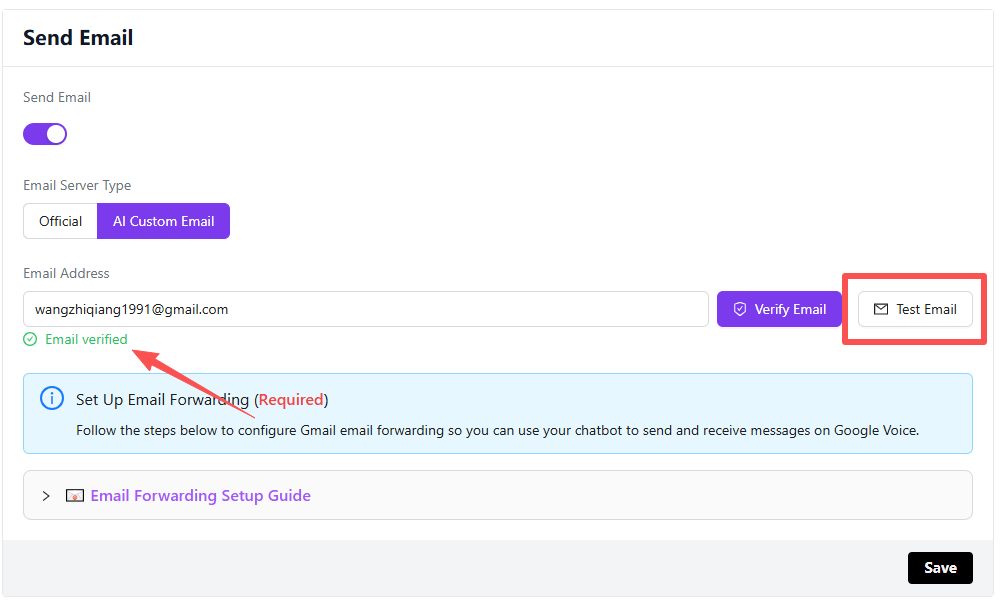
You will see that your email is now verified. You can click the Test Email button to send a test email.
7. Send Test Email
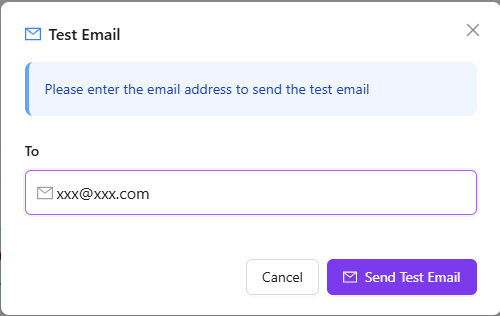
Enter the recipient email address in the pop-up dialog, click the Send Test Email button, then check the target email inbox. Note: The recipient email cannot be the same as the sender email.
8. Test Complete
Test completed. You can now proceed to set up email forwarding. Please refer to the page documentation for details.